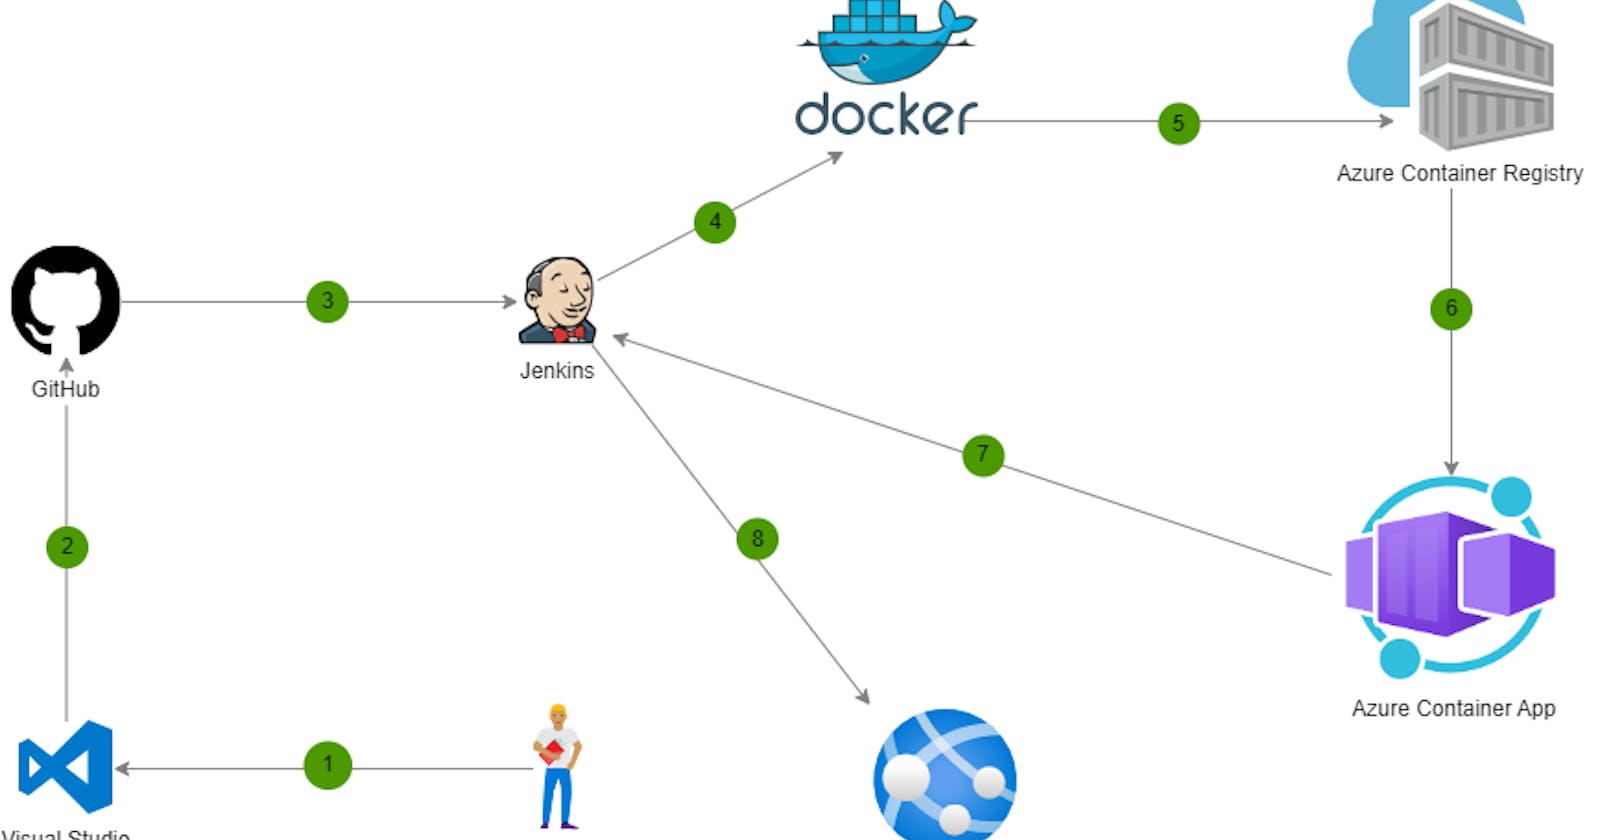
This article shows how to install Docker on an Ubuntu Linux VM for developing, packaging and shipping your containerized apps. We will need the Docker engine to build and push our containerized OCI images to the Azure container registry with Jenkins.
What is Docker?
Docker is a software platform that allows you to build, test, and deploy applications quickly. Docker packages software into standardized units called containers that have everything the software needs to run including libraries, system tools, code, and runtime. Since Docker is platform agnostic, you can quickly deploy and scale applications into any environment and you are convinced that your code will run.
Why use Docker?
Docker makes it really easy to install, build, test, ship and run software without worrying about its setup or dependencies and libraries.
1. Install Docker Engine using the convenience script
Docker provides a convenience script at https://get.docker.com/ to install Docker into development environments non-interactively. We shall use the scripted installation method for convenience.
curl -fsSL https://get.docker.com -o get-docker.sh
sudo sh get-docker.sh
Note: In case you get permission denied while trying to connect to the Docker daemon socket Error: /var/run/docker.sock: connect: permission denied. Since a Jenkins job runs as service by the name 'jenkins', you will need to add the 'jenkins' user to the docker group. This will allow you to run Docker with non-root privileges
sudo usermod -aG docker jenkins
echo "jenkins ALL=(ALL) NOPASSWD:ALL" | sudo tee /etc/sudoers.d/jenkins
Restart the VM so that the group membership is re-evaluated.
sudo reboot
sudo service docker status
Let us run Docker Version to confirm the installation.
docker --version
There you have it. You have successfully installed the docker engine. It is time to get started with docker containers and images.
