How to use NGINX as a Reverse Proxy for an Apache Tomcat Web Server?


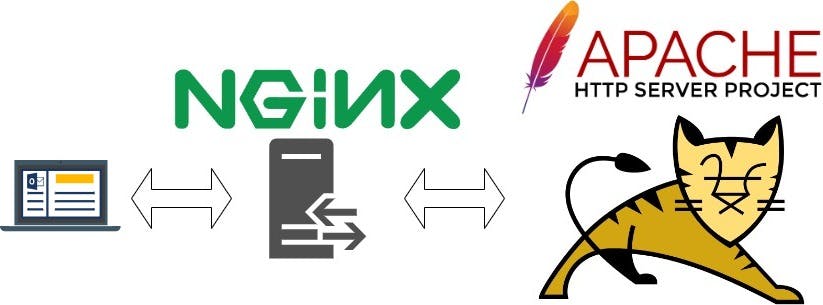
This is going to be a quick-start article to Configuring NGINX as a reverse proxy server for HTTP and other protocols. You will learn how to pass a request from NGINX to proxied servers over different protocols and TCP ports, modify client request headers that are sent to the proxied server.
What is NGINX?
As per Wikipedia, NGINX (pronounced "engine x", stylized as NGINX or nginx) is a web server that can also be used as a reverse proxy, load balancer, mail proxy and HTTP cache.
What is Apache Tomcat?
Wikipedia also defines Apache Tomcat (called "Tomcat" for short) as a free and open-source implementation of the Jakarta Servlet, Jakarta Expression Language, and WebSocket technologies. It provides a "pure Java" HTTP web server environment in which Java code can also run. Thus it is a Java web application server, although not a full JEE application server.
LAB SETUP
Azure Virtual Machine VM1 - Running Ubuntu 2204 + NGINX + Tomcat Server
Configure your environment
Azure subscription: If you don't have an Azure subscription, create a Azure free account before you begin.
Open Cloud Shell
If you already have a Cloud Shell session open, you can skip to the next section.
Browse to the Azure Portal
If necessary, log in to your Azure subscription and change the Azure directory with the subscription that you would like to use.
Open Cloud Shell.
Create the Azure Virtual Machine
Create a new Resource Group
az group create --name nginxrg267 --location eastus2
Create a new Azure VM
az vm create \
--resource-group nginxrg267 \
--name nginxvm267 \
--image Ubuntu2204 \
--admin-username "azureuser" \
--ssh-key-value ~/.ssh/id_rsa.pub \
--public-ip-sku Standard \
Open Firewall port 8080 for TOMCAT
az vm open-port \
--resource-group nginxrg267 \
--name nginxvm267  \
--port 8080 --priority 1010
Open Firewall port 80 for NGINX
az vm open-port \
--resource-group nginxrg267 \
--name nginxvm267  \
--port 80 --priority 1011
Install NGINX, JAVA and TOMCAT
Login to the Azure VM
sudo apt-get update -y && sudo apt-get install nginx fontconfig openjdk-17-jre -y
sudo systemctl start nginx && sudo systemctl enable nginx
sudo mkdir /opt/tomcat
sudo wget https://downloads.apache.org/tomcat/tomcat-10/v10.1.20/bin/apache-tomcat-10.1.20.tar.gz
sudo tar xzvf apache-tomcat-10tar.gz -C /opt/tomcat --strip-components=1
sudo sh -c 'chmod +x /opt/tomcat/bin/.sh'
sudo /opt/tomcat/bin/startup.sh
##OUTPUT should say "TOMCAT STARTED"
You should now be able to browse to the public IP or DNS Name of your Azure VM over the port 8080 and get the default TOMCAT page
You should also be able to browse to the public IP or DNS Name of your Azure VM and get the default NGINX page
You may configure a DNS Name for the Azure VM as shown below
Basic Proxy Routing with the Default NGINX Configuration File
We shall be using the Portfolio Template from github repository for this LAB.
git clone https://github.com/mfkhan267/nginx2024.git

sudo mv nginx2024/portfoliotemplate/ /portfoliotemplate/ -f
Backup the Default NGINX Configuration File
sudo cp /etc/nginx/nginx.conf /etc/nginx/nginx.conf.bak
EDIT the NGINX CONF File
sudo vi /etc/nginx/nginx.conf
COPY PASTE the below configuration code into the NGINX Conf File and Save / Close
user www-data;
worker_processes auto;
pid /run/nginx.pid;
include /etc/nginx/modules-enabled/*.conf;
events {
    worker_connections 768;
}

http {
    sendfile on;
    tcp_nopush on;
    types_hash_max_size 2048;
    include /etc/nginx/mime.types;
    default_type application/octet-stream;
    ssl_protocols TLSv1 TLSv1.1 TLSv1.2 TLSv1.3; # Dropping SSLv3, ref: POODLE
    ssl_prefer_server_ciphers on;
    access_log /var/log/nginx/access.log;
    error_log /var/log/nginx/error.log;
    include /etc/nginx/conf.d/*.conf;
    include /etc/nginx/sites-enabled/*;
    server {
        listen 80;
        server_name localhost;
        root /portfoliotemplate/;
    }
}
Validate the NGINX Configuration
sudo nginx -t
Reload the NGINX Configuration File
nginx -s reload
Your Portfolio website should now be rendered on the http://localhost:80 OR http://localhost
Application Level Routing with the Custom Configuration File
Create a NGINX Conf File for TOMCAT
sudo vi /etc/nginx/sites-available/tomcat.conf
Copy paste below snippet to the tomcat.conf as below and save / close the file
server {
  listen 8000;
  server_name    <Domain Name or Public IP of VM>;
  access_log /var/log/nginx/tomcat-access.log;
  error_log /var/log/nginx/tomcat-error.log;
  location / {
        proxy_set_header X-Forwarded-Host $host;
        proxy_set_header X-Forwarded-Server $host;
        proxy_set_header X-Forwarded-For $proxy_add_x_forwarded_for;
        proxy_pass http://127.0.0.1:8080/;
  }
}
The tomcat.conf file should look like as shown below
Validate the NGINX Configuration
sudo nginx -t
Enable the NGINX host configuration file for TOMCAT and restart the NGINX web server to apply the changes
sudo ln -s /etc/nginx/sites-available/tomcat.conf /etc/nginx/sites-enabled/

sudo systemctl reload nginx OR sudo nginx -s reload
If all OK, Restart the NGINX Service
sudo systemctl restart nginx
If you now browse to the DNS name of your Azure VM, you should see the TOMCAT Default Page instead of the NGINX Default Page.
Now, you can access your Tomcat default webpage using the URL http://domain_name OR http://<PUBLIC_IP>
OPTIONAL - You may also create a systemd service for Tomcat
sudo vi /etc/systemd/system/tomcat.service
Copy and Paste the below Tomcat Systemd Service Script
[Unit]
Description=Apache Tomcat Web Application Container
After=syslog.target network.target

[Service]
Type=forking

Environment="JAVA_HOME=/usr/lib/jvm/java-1.17.0-openjdk-amd64"
Environment="CATALINA_PID=/opt/tomcat/temp/tomcat.pid"
Environment="CATALINA_HOME=/opt/tomcat/"
Environment="CATALINA_BASE=/opt/tomcat/"
Environment="CATALINA_OPTS=-Xms512M -Xmx1024M -server -XX:+UseParallelGC"
Environment="JAVA_OPTS=-Djava.awt.headless=true -Djava.security.egd=file:/dev/./urandom"

ExecStart=/opt/tomcat/bin/startup.sh
ExecStop=/opt/tomcat/bin/shutdown.sh

[Install]
WantedBy=multi-user.target
Reload Daemon
sudo systemctl daemon-reload
Start and Enable the Tomcat Service
sudo systemctl start tomcat && sudo systemctl enable tomcat
References
https://docs.nginx.com/nginx/deployment-guides/load-balance-third-party/apache-tomcat/
https://docs.nginx.com/nginx/admin-guide/web-server/reverse-proxy/
https://www.digitalocean.com/community/tutorials/install-tomcat-on-linux
https://www.atlantic.net/vps-hosting/how-to-setup-tomcat-with-nginx-as-a-reverse-proxy-on-ubuntu/