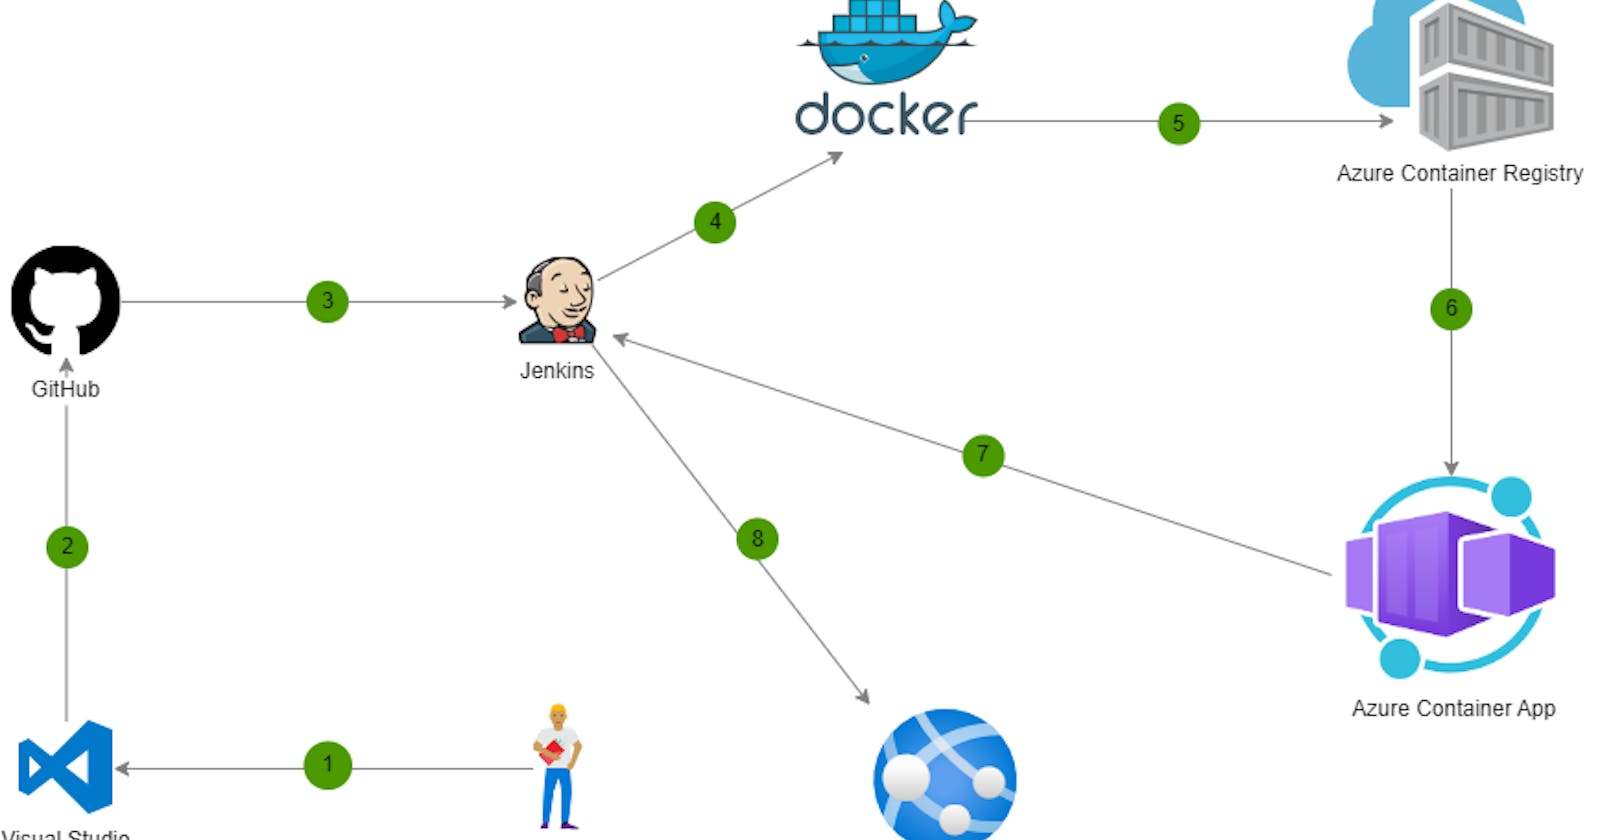
This article shows you how to install Jenkins on an Ubuntu Linux VM running in Azure Cloud.
What is Jenkins?
Jenkins is a self-contained, open source automation server which can be used to automate all sorts of tasks related to building, testing, and delivering or deploying software. It can be easily integrated as one of the most advanced tools for implementing effective DevOps solutions.
Here are the quick steps:
Get yourself a free Azure Account if you do not have one already
Create a resource group
Create a Ubuntu Linux VM with the setup file also called the cloud init custom data
Open port 8080 in order to access Jenkins on the virtual machine (Yes Jenkins runs on port 8080)
Connect to the virtual machine via SSH and the PublicIP of the VM
Configure a sample Jenkins pipeline job
Build the sample Jenkins pipeline job
1. Configure your environment
Azure subscription: If you don't have an Azure subscription, create a Azure free account before you begin.
2. Open Cloud Shell
If you already have a Cloud Shell session open, you can skip to the next section.
Browse to the Azure Portal
If necessary, log in to your Azure subscription and change the Azure directory with the subscription that you would like to use.
Open Cloud Shell.
3. Create a virtual machine
Fetch your account details as shown below (we will need these further down the document as we proceed.
Create a test directory by a name of your choice. I called mine jenkins267.
Switch to the test directory created above.
Create a file named cloud-init-jenkins.txt.
Paste the following code into the new file:
#cloud-init-config-Jenkins
package_upgrade: true
runcmd:
 - sudo apt-get update && sudo apt-get install fontconfig openjdk-17-jre -y
 - sudo wget -O /usr/share/keyrings/jenkins-keyring.asc https://pkg.jenkins.io/debian-stable/jenkins.io-2023.key
 - echo 'deb [signed-by=/usr/share/keyrings/jenkins-keyring.asc] https://pkg.jenkins.io/debian-stable binary/' | sudo tee /etc/apt/sources.list.d/jenkins.list > /dev/null
 - sudo apt-get update && sudo apt-get install jenkins -y
 - sudo systemctl start jenkins && sudo systemctl enable jenkins
Run az group create command to create a resource group.
// azurecli command
az group create --name jenkins267 --location eastus2
Run az vm create to create a virtual machine.
// azurecli command
az vm create \
--resource-group jenkins267 \
--name jenkinsvm267 \
--image Ubuntu2204 \
--admin-username "azureuser" \
--generate-ssh-keys \
--public-ip-sku Standard \
--custom-data cloud-init-jenkins.txt
OR (if you already have a ssh key pair that you would like to use)
// azurecli command
az vm create \
--resource-group jenkins267 \
--name jenkinsvm267 \
--image Ubuntu2204 \
--admin-username "azureuser" \
--ssh-key-value ~/.ssh/id_rsa.pub \
--public-ip-sku Standard \
--custom-data cloud-init-jenkins.txt
Run az vm list command to verify the creation (and state) of the new virtual machine.
// azurecli command
az vm list -d -o table --query "[?name=='jenkinsvm267']"
As Jenkins runs on port 8080, let us now run az vm open-port command to open port 8080 on the new virtual machine. You also need to open additional ports later on if your container app is listening on other ports like 8080, 3000 and so on.
Note: The Jenkins port may be configured as per your business requirement and security policies with the 'sudo systemctl edit jenkins' command.
// azurecli command
az vm open-port \
--resource-group jenkins267 \
--name jenkinsvm267 \
--port 8080 --priority 1010
4. Configure Jenkins
Run az vm show command to get the public IP address for the sample virtual machine.
// azurecli command
az vm show \
--resource-group jenkins267 \
--name jenkinsvm267 -d \
--query [publicIps] \
--output tsv

You may retieve the IP address from the Azure Portal Console and selecting the Virtual Machine named jenkinsvm267
Using the IP address retrieved in the previous step, SSH into the virtual machine. You'll need to confirm the connection request.
// azurecli command
ssh azureuser@<ip_address>
Verify that Jenkins is running by getting the status of the Jenkins service.
// bash command
service jenkins status
Get the autogenerated Jenkins password.
// bash command
sudo cat /var/lib/jenkins/secrets/initialAdminPassword
Using the IP address, open the following URL in a browser: http://<ip_address>:8080
Enter the password you retrieved earlier and select Continue.
Select Select Install suggested plug-ins.
Enter the information for the first admin user and select Save and Continue. I highly recommend that you create the admin user by the same name as the admin user that you configured with the VM creation step.
On the Instance Configuration page, select Save and Finish.
Select Start using Jenkins.
5. Create your first job
On the Jenkins home page, select Create a job.
Enter a job name of my-first-freestyle-hello-world, select Freestyle project, and select OK.
Select the Build tab, then select Add build step
From the drop-down menu, select Execute Shell.
// bash command
echo "Hello World"
You may also select a Pipeline project, and select OK and try the sample Hello-World pipeline.
Scroll to the bottom of the page, and select Save.
6. Build the sample Freestyle or Pipeline Hello-World job
When the home page for your project displays, select Build Now to execute your Jenkins job.
A graphic below the Build History heading indicates that the job is being executed or completed. Go to the job build and console output to see the results.
Congratulations! You have successfully executed your first Jenkins Job. Your Jenkins server is now ready to build your projects in Azure!
Troubleshooting
If you encounter any problems configuring Jenkins, refer to the Jenkins installation page for the latest instructions and known issues.
